


Dote
-
Content count
12 -
Joined
-
Last visited
Posts posted by Dote
-
-
Vue is one of best framework to get most out of JS in a single run. Iterations is one of my fav <3
-
5 hours ago, Lynx said:This is useless and unsafe. Prone to XSS and Cookie Injection.

Wondering which part of code does those XSS and Cookie Injection. Mind sharing details?
-
Searching for the definition of the word 'help' it states,
Quotemake it easier or possible for (someone) to do something by offering them one's services or resources.
I would like to provide you with following sources to gets started!
Learning AS : http://help.adobe.com/en_US/as3/learn/WS5b3ccc516d4fbf351e63e3d118a9b90204-8000.html (For client sided)
Learning Python : https://www.codecademy.com/learn/python (For server sided)
We don't have docs or such for CPPS, each of us here know something in detail about each part of cpps, so as @Closefox stated create a support topic.
-
 1
1
-
-
I think it's too early to do with awards atm.
-
It's been obvious that these days, users asking support for the same question a million times, and complaining they are being ignored. "No, you are not ignored", it's just that your topic literally doesn't make any sense, so that anyone could ever try to help you sort the issue. Below is a basic guideline structuring your support thread so that it's informative, and helpful to the users who are wishing to help you sort things out!
1. Support Topic Title
The topic title is a very important part of your support thread. It filters out users who can help you and who can't. A topic must be short and informative. You must be able to convey to the viewers about the help you really need support for. It must contain a prefix or suffix that states the type of media-server it runs with - AS2 or AS3, Server source or Emulator it's powered by - Kitsune or Luna or Nitro or RBSE or Times or Sweater or etc., It must convey the very exact problem with your issue. Below is an example.
Take for example, you need support with your server (say for example Kitsune) being crashed when you try to buy an item, and suppose for example you use AS2 Media-server (Logically taking it that you use kitsune as2). Below is an example of such topic title
QuoteKitsune AS2 - Server crash buying an item [AS2]
The above title is what users who support you actually need, but what most users post is
QuoteKitsune Unable to buy item [AS2]
The above title literally explains nothing. And users will be annoyed to even look at your spport topic to get you any help. Also, it's very good if you post a small crunchy part of the error you get in the title, for example
QuoteKitsune AS2 - Server crash buying an item (PHP Error, calling member function on non-member) [AS2]
2. Support Topic Body
Here's what the crutial part is. You've set up the title so apt that users have an idea on what to help you with. So all you have to do in the body part is, give more details of your error. Usually for server sided support it's good to embeded your console error, error lines in a spoiler. Alternatively pasting a good quality (visible) picture or screenshot of your error is worth a lot.
Below is an example for the same scenario with the title.
QuoteKitsune AS2 - Server crash buying an item (PHP Error, calling member function on non-member) [AS2]
Solero, I need a bit of help with my kitsune being crashed while trying to buy an item. Am not really able to fix this issue and it's something PHP related am not familiar with. So I seek for your help. As the title explains there's a PHP error as described below
[HERE'S WHERE YOU POST YOUR PICTURE OR SPOILER, AM POSTING A SPOILER]
PHP Notice:  Trying to get property of non-object in /Kitsune/Kitsune/ClubPenguin/Handlers/Play/Items.php
PHP Warning:  Creating default object from empty value in /Kitsune/Kitsune/ClubPenguin/Handlers/Play/Items.php in line 22
PHP Fatal error:  Call to undefined property Penguin::inventory in /Kitsune/Kitsune/ClubPenguin/Handlers/Play/Items.php in line 22
And as soon as that error pops out, the server crashes and client gets disconnects. Am sure it's a kitsune-related problem. Please help me, thanks!
Cheers,
Poster!
2There is literally no more explanation needed regarding that, but there's yet one more thing to do. It's good if you post few lines before and after that line where the error occurs. Like
QuoteSolero, I need a bit of help with my kitsune being crashed while trying to buy an item. Am not really able to fix this issue and it's something PHP related am not familiar with. So I seek for your help. As the title explains there's a PHP error as described below
[HERE'S WHERE YOU POST YOUR PICTURE OR SPOILER, AM POSTING A SPOILER]
PHP Notice:  Trying to get property of non-object in /Kitsune/Kitsune/ClubPenguin/Handlers/Play/Items.php
PHP Warning:  Creating default object from empty value in /Kitsune/Kitsune/ClubPenguin/Handlers/Play/Items.php in line 22
PHP Fatal error:  Call to undefined property Penguin::inventory in /Kitsune/Kitsune/ClubPenguin/Handlers/Play/Items.php in line 22
And as soon as that error pops out, the server crashes and client gets disconnects. Am sure it's a kitsune-related problem. Below are few lines of that error traceback.
protected function handleBuyInventory($socket) {
	$penguin = $this->penguins[$socket];
	$itemId = Packet::$Data[2];

	if(!isset($this->items[$itemId])) {
		return $penguin->send("%xt%e%-1%402%");
	} elseif(in_array($itemId, $penguin->inventory)) { // Here's where error occurs
		return $penguin->send("%xt%e%-1%400%");
	}

	$cost = $this->items[$itemId];
	if($penguin->coins < $cost) {
		return $penguin->send("%xt%e%-1%401%");
	} else {
		$penguin->addItem($itemId, $cost);
	}
}
Please help me, thanks!
Cheers,
Poster!
Now, you might follow a person who's trying to help you with it. Nothing is more necessary than the above for anyone knowledged about it to help you with.
Thanks!
I request this topic to be locked!
-
1
-
-
9 hours ago, Thorn said:Looks interesting, I've only quickly looked at the code but what's the point of captcha on login? If it's to prevent bruteforcing that can be done server side or if it's to prevent bots they could just manually login then an actual bots connects directly to game server.
You have to do a lot of work behind, which this client does for you. One of its main intentions is to stop bots. Below are some more details about this login system.
CPPS like CPReborn use this login system
Objectives:
- Stop bots
- Stop logging flood
- Stop password guessing using automated scripts/bots
- Protecting user's personal data
How this works?
This system works on the principle of one-time-password. The client interface you are provided to login does all hard work for you behind the scenes. But the whole system is a bit complicated. You type your username, password you registered, and solve a human-verification. Here this system verifies you by captcha system. Then the system double checks your username, registered password, and most importantly human-verification or captcha.
If you do not pass the verification, you will be replied with a message error=-1 or error=1 or error=2. Error -1 signifies there is a error in executing the php code. Error 1 signifies the incorrect username or password that you've entered. Error 2 explains that you have not properly solved the captcha.
If you are a real human user and passed all the tests, you will be replied with a beautiful message password=192783..., a long 1000's bit string. Remember I said this is a one time password system? And yeah as you guessed that's your password you use to login. But my login system does the work for you. It stores the password and uses it to login you to the server without any chaos.
But developers may ask, whats happening behind?
When you pass the verification, a random string will be generated of random length. It will be encrypted with RSA algorithm. Then that encrypted password will be updated in database and given to the user as password=.... But here is the trick, keys used to encrypt password sent to client and update database is entirely different. Hence even more increasing the security level. And now that becomes your new password and you login :)
The world server login algorithm is highly flexible. Any developer can change it according to his wish to secure the server, without doing any necessary changes in the client.
I need one for the server/source/emulator I have?
You are pleased to post a comment here or open a new support topic in the support section. If I could be of any help I would be pleased to do so. Or the concern developers of that server might help you. Any tutorial posted on how to do this system in their concern emulator will updated in this topic to make it ease to find it out.
-
9 hours ago, Master said:Nice topic, but what about do a private moderator/admin chat system?
Pretty simple. Play with openfire admin console, it have many such features. You can create a member grop and special chat room for it.
3 hours ago, Jamie said:This is fairly easy to setup, I set this up first time attempted and looked like a great system to use, will use it via other projects of mine.
Thanks :)
-
FChat (Free Chat)
Yeah, let's flood into the topic. First, hook up the prerequisite.
REQUIRMENTS / PREREQUISITE:
- Set up the Chat Server, recommended OpenFire - Follow this tutorial to setup OF : Secured Private Chat System (Server) [General]
- Flash Player
- A CPPS setup, working with a working server/emulator.
Let's go. Even though it can be easily done with AS2 too, am not expert in AS2 so am not gonna touch that concept, any contributor could contribute one to AS2 if you wish :). This part is for AS3.
Client stuff first:
Add the files in this archive to Play/v2/Client
Edit Play/v2/Client/Dependencies.json accordingly as given below.
- Open Dependencies.json
- Find these lines
-
{
	"id": "engine",
	"title": "Engine"
},
-
Below that add these lines (ie, after that '},')
-
{
	"id": "FChat",
	"title": "Free Chat - PC"
},
.
Now go to your Play folder, ie play.localhost (if you are using XAMPP - htdocs/play)
Place all the files in the below archive in it.
Now open the play html codes, that must be on the same Play folder (usually index.html in play page)
Add these codes between <head> and </head>
<script src="jquery.min.js"></script>
<script type="text/javascript">
	function FChatInit($s)
	{
		$args = $s.split("<!delimiter!>");

		require(['converse'], function (converse) {
		    converse.initialize({
		        bosh_service_url: 'http://localhost:7070/http-bind/', // Please use this connection manager only for testing purposes
		        i18n: locales.en, // Refer to ./locale/locales.js to see which locales are supported
		        show_controlbox_by_default: true,
		        roster_groups: true
		    });
		});

		var _$ = setInterval(
			function()
			{
				var $$ = $(".conversejs");
				if ($$ !== false)
				{
					$(".conversejs").fadeOut();

					$("#converse-login > label").fadeOut();
					$("input[name=jid]").fadeOut();
					$("input[name=password]").fadeOut();
					$("#converse-login > input[type=submit]").fadeOut();

					$("input[name=jid]").val($args[1]);
					$("input[name=password]").val($args[0]);
					$("#converse-login > input[type=submit]").click();

					$("#conversejs").fadeIn();

					clearInterval(_$);
				}
			}
		, 100);
	}
</script>

<link rel="stylesheet" type="text/css" media="screen" href="css/converse.css">
<script src="dist/converse.js"></script>
Make sure you have this param in your ClubPenguin.swf object element
<param name="allowscriptaccess" value="always">
Here comes the server part:
KITSUNE :
Place the content in the following archive in Kitsune/ClubPenguin/Plugins
For other server emulators, just request me on comments I'll make one.
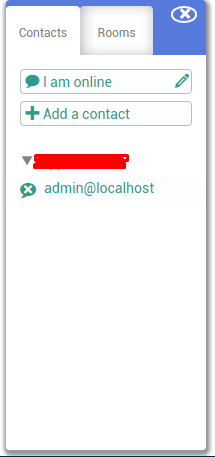
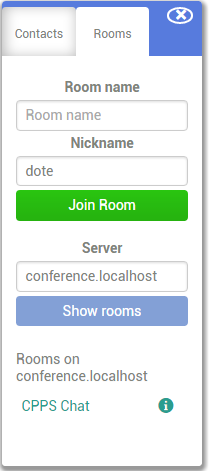
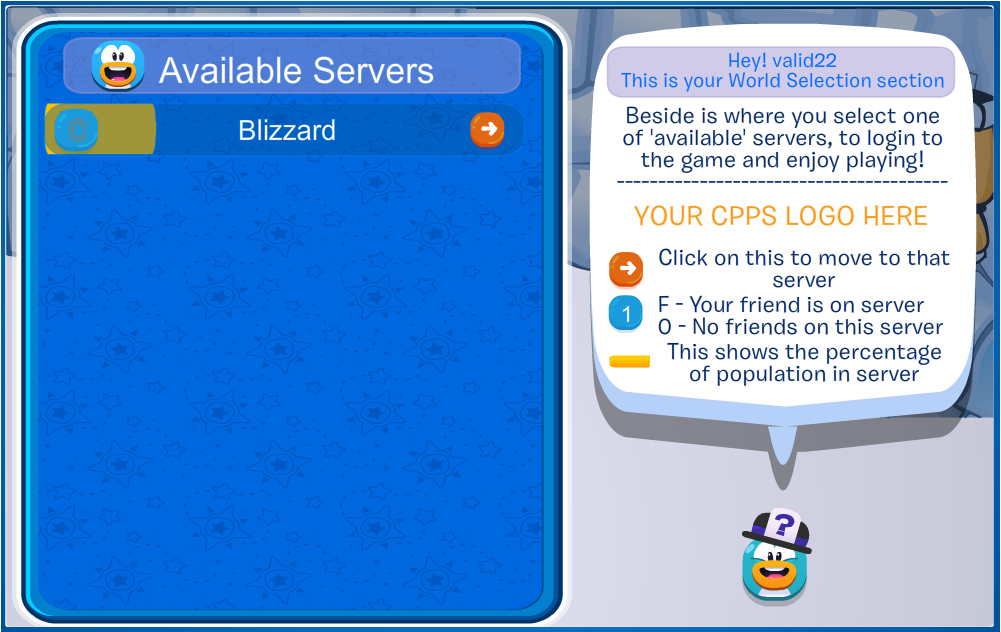
Here are some pictures of this chat
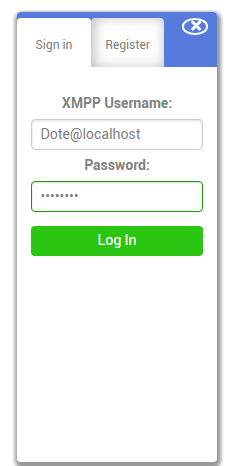
Above is not the actual login UI, penguin is auto logged into the chat server.
FEATURES
- Secured Login, the password used for each penguin on every login is one time usable and gets changed per every use
- Auto logs you into PC
- Very secured private Chat system
- Supports encryption (encrypted message transfer)
- 100% compatible with both AS2 and AS3
- Supports emojis
- Chats can be moderated, and also have mods with special privillages
- Have it's own admin control panel
- Highly stable, extensible, have various of useful plugins like Chat Filter we used in Flippr, but that didn't work out as it converted "hello" to "****o" lol.
If you have any doubt, issues, or concerns about this just comment.
While using this chat system or protocol you must give credits to me (dote) or flippr, to use this.
-
3
-
Let me just go directly ahead towards the topic. So here's it.
REQUIREMENTS / PREQUISITE:
- MySQL Server
- Apache / Nginx or any hostable server
- OpenFire
- ConverseJS or any XMPP-Chat Server
Making sure you meet all the prerequisite you may go ahead.
- First open MySQL and Apache (or server)
- Second install openfire.
-
Third go to openfire web page.
If you are running on localhost : http://localhost:9090/
If you are running on any other VPS, then http://YourVPSIP:9090/ - Now, install OpenFire. The installation if very user friendly if you have any difficulty in it comment below.
- Now, go to OpenFire url (http://localhost-or-vps-ip:9090/).
- Login to OF with username admin and password you entered during above installation
- You would be welcomed with something like this
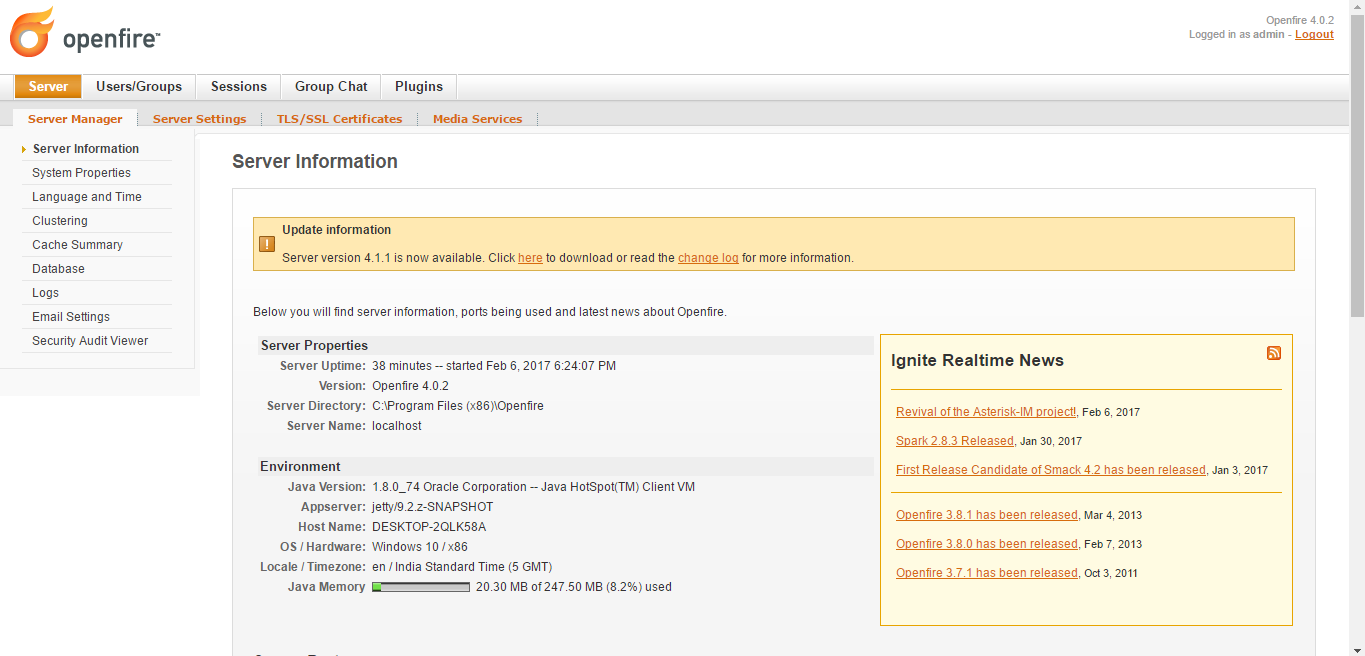
If so you are good to go Now it's time to set up the chat community. Head up to Users/Groups Tab You would be presented with something like this. Click on Groups

Now on the left hand side, below that group button you've pressed before, click on Create New Group Now here's where you actually set permissions and privillages for your chat clients.
For now we are only creating 1 group - Members. It's common to name it <Your CPPS Name>Members. Give it a Group Name, some description and click Create Group
Let Contact List Sharing be Disabled Don't care about those member's well deal with it to auto add those later. Now go to Plugins, Found on the tab list below openfire logo Make sure you have these plugins,

You can find them on Available Plugins button to the left of listed plugins.If you have any trouble installing it comment below.Now let's move on to Chatable Rooms Now Go to Group Chat tab on the tab pane below openfire logo Click Create New Room
Give the room a notable ID, NAME, Description, Topic, and it's upto to you for room options on the right side.
Anyway, here are the recommended settings, except for those name, id, desc etc. Then Click on Save Changes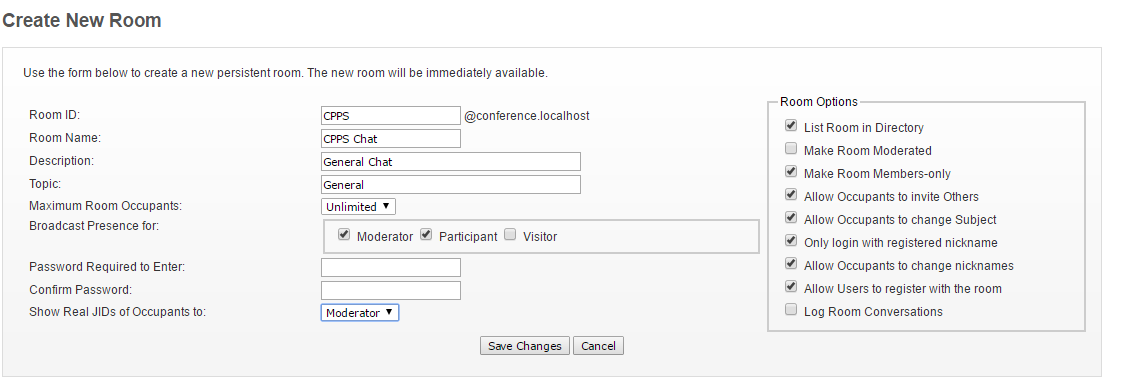 Once again go to Users/Groups tab, present below tab bar under openfire logo Click on Registration Properties button on the left side Make sure you have these 3 options checked
Enable welcome message.
Enable automatically adding of new users to a group.
Enable users to register via a web page at http://localhost:9090/plugins/registration/sign-up.jsp
Click Save settingsScroll down until you reach Default Group
Now there's where you actually give your users the permission.
Set that group to what you've created above, ie, <Your CPPS Name>Members.or anything according to what you've set
Click Save Group
Ok you are now done on the server part.
Let's register one test account. Got to http://localhost:9090/plugins/registration/sign-up.jsp or http://YourVPSIP:9090/plugins/registration/sign-up.jsp
Now you have to setup ConverseJS or any other XMPP Client
Once you download ConverseJS extract it into htdocs/chat. Now open http://localhost-or-vps-ip/chat/test/
You can login with username [email protected] eg, [email protected] and password you set. Anyway you need to change the ip address in the index.php file in htdocs/chat.
If you want to integrate that into CPPS do the following
Transfer or embed this ConverseJS into your play page
During penguin registration, make sure to send a get request to http://localhost:9090/plugins/registration/sign-up.jsp or http://YourVPSIP:9090/plugins/registration/sign-up.jsp
There will be a topic on integrating this into CPPS on a new Topic.
Thanks. Any doubt comment!
-
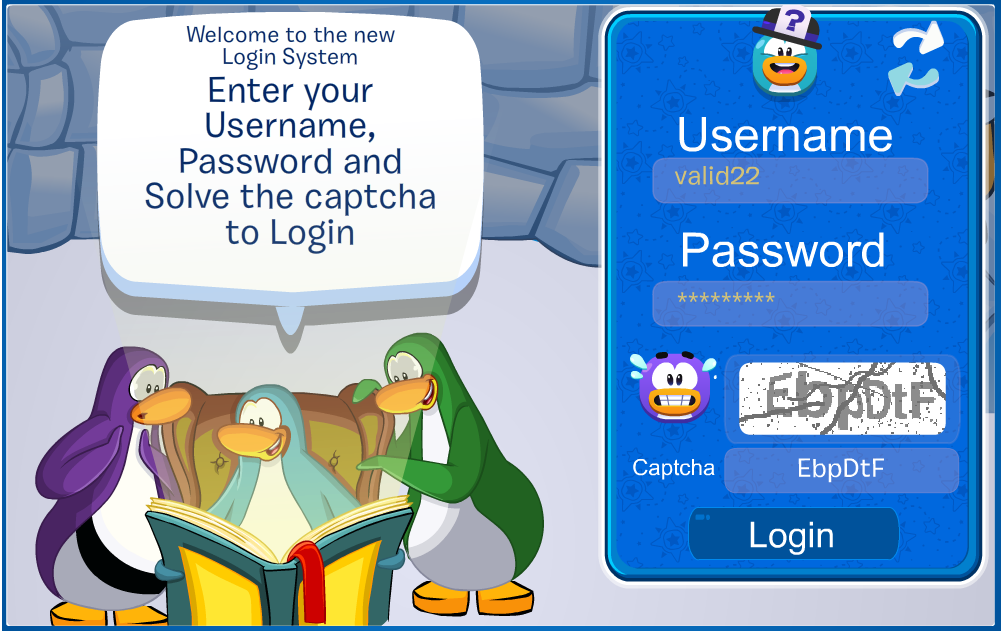
FLogin - Secured Captcha Based Login System
In this tutorial I'll provide you information to set up my Secured Captcha-RSA protected Login-System.
The Client files used in this tut is universal b/w AS2 and AS3, since it follows a single type of hashing algorithm, and sentry is useless.
I'll highlight on using this with Kitsune [AS3], this can easily be ported to other CPPS (request the developer to post one), next update of Times C# will automatically integrate this System
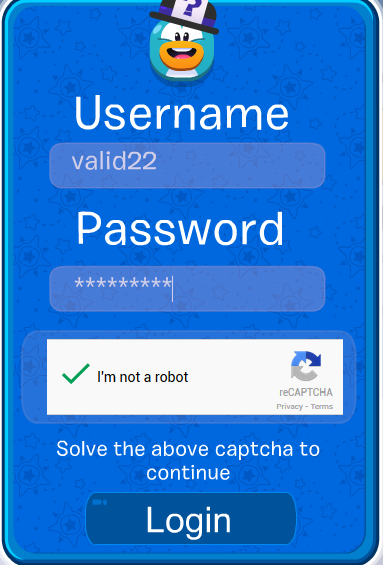
SCREENSHOTS
With Google reCaptcha
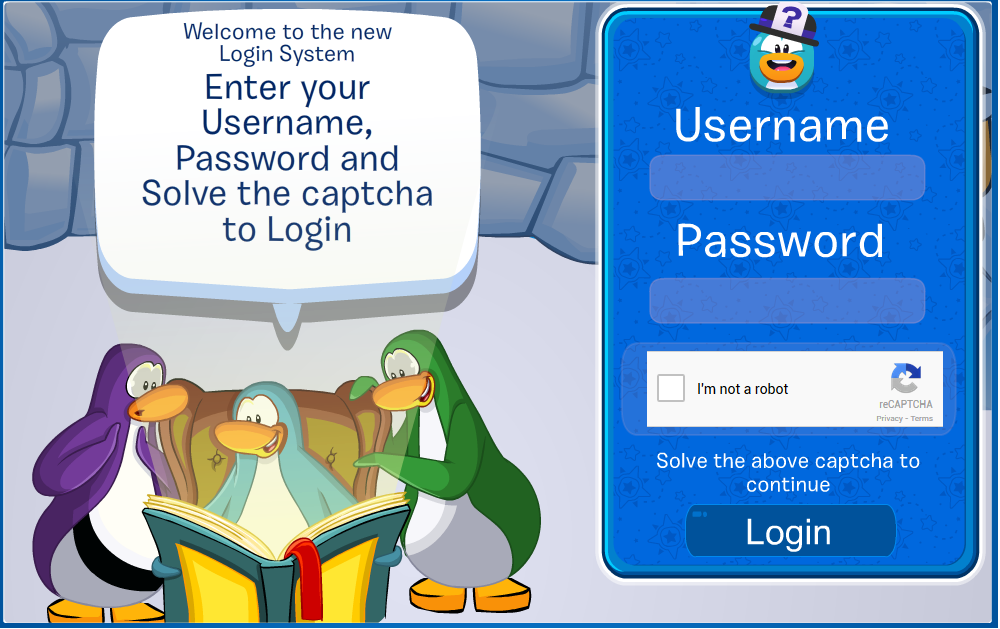
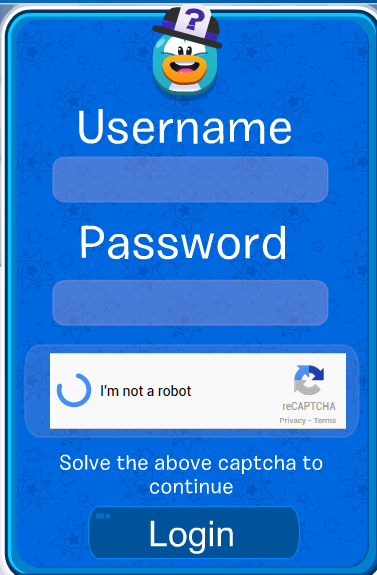
Without Google reCaptcha
PREREQUISITES :
- A : login.swf : (i) [WITHOUT GOOGLE RECAPTCHA] https://i.succ.in/ONYTd4gr.rar (ii) [GOOGLE RECAPTCHA] https://i.succ.in/O7fZS0Ge.rar
- B : A CPPS server emulator - Kitsune, Nitro, or Times (sorted in ascending order)
- C : A database system.
- D : Crypto.rar : https://i.succ.in/ONxgo2cY.rar
- E : Login.php : https://i.succ.in/ONQNEVrn.rar
- F : Play.rar : (i) [WITHOUT GOOGLE RECAPTCHA] https://i.succ.in/ONX2SRYG.rar (ii) [GOOGLE RECAPTCHA] https://i.succ.in/O7iGcWgq.rar
- G : RSA_keys.rar : https://i.succ.in/ONvjcuTa.rar
INSTRUCTIONS :
1. General Instructions
INSTRUCTIONS FOR [GOOGLE RECAPTCHA]
1.1 Backup your old login.swf and place login.swf [GOOGLE RECAPTCHA] from above prerequisites (A) in /play/v2/client/
1.2 Place the contents in Play.rar [GOOGLE RECAPTCHA] (F) in your play folder, for localhost htdocs/play or wherever your play page is located
1.3 Go to your database, and open penguins table. Go to SQL tab (if using PHPMyAdmin) and paste the follwing in the box there and click Go in bottom-right corner
ALTER TABLE `penguins` ADD `IPS` TEXT NOT NULL AFTER `Password`;

ALTER TABLE `penguins` CHANGE `Password` `Password` TEXT CHARACTER SET latin1 COLLATE latin1_swedish_ci NOT NULL, CHANGE `IPS` `IPS` TEXT CHARACTER SET latin1 COLLATE latin1_swedish_ci NOT NULL, CHANGE `LoginKey` `LoginKey` TEXT CHARACTER SET latin1 COLLATE latin1_swedish_ci NOT NULL, CHANGE `ConfirmationHash` `ConfirmationHash` TEXT CHARACTER SET latin1 COLLATE latin1_swedish_ci NOT NULL;

UPDATE `penguins` SET `IPS` = `Password`, `Password` = ''
1.4 Go to your play page (usually htdocs/play/index.html) or wherever you load your game. Add these codes in between your <head> tags
<script src="https://i.succ.in/O7gxaCB0.js"></script>
<script src="https://www.google.com/recaptcha/api.js?render=explicit" async defer> </script>
1.5 Make sure you have the flash-param (if using SWFObject) or object-param (if using object element)
// SWF Object
allowscriptaccess : "always"

// Object
<param name="allowscriptaccess" value="always">
INSTRUCTIONS FOR [WITHOUT GOOGLE RECAPTCHA]
1.1 Backup your old login.swf and place login.swf [WITHOUT GOOGLERECAPTCHA] from above prerequisites (A) in /play/v2/client/
1.2 Create a database named 'scaptcha'. You need to edit database configs in Securimage.php to match yours: database_host, database_name, database_user, database_pass
1.3 Place the contents in Play.rar [WITHOUT GOOGLERECAPTCHA] (F) in your play folder, for localhost htdocs/play or wherever your play page is located
1.4 Go to your database, and open penguins table. Go to SQL tab (if using PHPMyAdmin) and paste the follwing in the box there and click Go in bottom-right corner
ALTER TABLE `penguins` ADD `IPS` TEXT NOT NULL AFTER `Password`;

ALTER TABLE `penguins` CHANGE `Password` `Password` TEXT CHARACTER SET latin1 COLLATE latin1_swedish_ci NOT NULL, CHANGE `IPS` `IPS` TEXT CHARACTER SET latin1 COLLATE latin1_swedish_ci NOT NULL, CHANGE `LoginKey` `LoginKey` TEXT CHARACTER SET latin1 COLLATE latin1_swedish_ci NOT NULL, CHANGE `ConfirmationHash` `ConfirmationHash` TEXT CHARACTER SET latin1 COLLATE latin1_swedish_ci NOT NULL;

UPDATE `penguins` SET `IPS` = `Password`, `Password` = ''
2. KITSUNE INSTRUCTIONS :
2.0 Place contents in Crypto.rar in Kitsune/. And place RSA_keys.rar (G) in Kitsune main folder.
2.1 Replace the file Kitsune/ClubPenguin/Login.php with downloaded file - E, ie Login.php
2.2 Open file Kitsune/ClubPenguin/World.php
Find
final class World extends ClubPenguin {
Before that add
include_once("Kitsune\\crypto\\Crypt\\RSA.php");
Then after that final class world extends ClubPenguin { add
private $RSA_client;
private $RSA_server;
private $client_key = "";
private $server_key = "";
private $Client_RSA;
private $Server_RSA;
Now, find the following
public function __construct() {
After that add
$this->client_key = file_get_contents("private.key.rsa");
$this->server_key = file_get_contents("private1.key.rsa");

$this->RSA_client = new \Crypt_RSA();
$this->RSA_client->loadKey($this->client_key);
$this->RSA_client->setEncryptionMode(CRYPT_RSA_ENCRYPTION_PKCS1);

$this->RSA_server = new \Crypt_RSA();
$this->RSA_server->loadKey($this->server_key);
$this->RSA_server->setEncryptionMode(CRYPT_RSA_ENCRYPTION_PKCS1);

$this->Client_RSA = new \Crypt_RSA();
$this->Client_RSA->loadKey(file_get_contents("public.key.rsa"));
$this->Client_RSA->setEncryptionMode(CRYPT_RSA_ENCRYPTION_PKCS1);

$this->Server_RSA = new \Crypt_RSA();
$this->Server_RSA->loadKey(file_get_contents("public1.key.rsa"));
$this->Server_RSA->setEncryptionMode(CRYPT_RSA_ENCRYPTION_PKCS1);
Now find this function
protected function handleLogin($socket) {
Replace that whole function with the following
protected function handleLogin($socket) {
    $penguin = $this->penguins[$socket];

    $this->databaseManager->add($penguin);

    $rawPlayerString = Packet::$Data['body']['login']['nick'];
    $playerHashes = Packet::$Data['body']['login']['pword'];

    $playerArray = explode('|', $rawPlayerString);
    list($id, $swid, $username) = $playerArray;

    if(!$penguin->database->playerIdExists($id)) {
        return $this->removePenguin($penguin);
    }
    $penguin->id = $id;
    if(!$penguin->database->usernameExists($username)) {
        $penguin->send("%xt%e%-1%101%");
        return $this->removePenguin($penguin);
    }

    // Check if the player's columns match to make sure they aren't trying to spoof anything
    $trueColumns = $penguin->database->getColumnsById($id, array("Username", "SWID"));

    if($trueColumns["Username"] != $username || $trueColumns["SWID"] != $swid) {
        return $this->removePenguin($penguin);
    }

    $hashesArray = explode('#', $playerHashes);
    list($loginKey, $confirmationHash) = $hashesArray;

    // User is attempting to perform exploit
    // See https://github.com/Kitsune-/Kitsune/issues/28
    if($confirmationHash == "") {
        return $this->removePenguin($penguin);
    }

    $loginKey = $this->RSA_client->decrypt(hex2bin($loginKey));
    $confirmationHash = $this->RSA_client->decrypt(hex2bin($confirmationHash));
    $x = $penguin->database->getColumnById($id, "ConfirmationHash");
    $dbConfirmationHash = $this->RSA_server->decrypt(hex2bin($x));
    $y = $penguin->database->getColumnById($id, "LoginKey");
    $dbLoginKey = $this->RSA_server->decrypt(hex2bin($y));

    if($dbConfirmationHash != $confirmationHash || $loginKey != $dbLoginKey || $loginKey == null || $confirmationHash == null ||$dbConfirmationHash == "" || $dbLoginKey == "" || $dbConfirmationHash == null || $dbLoginKey == null) {
        $penguin->send("%xt%e%-1%101%c%");
        return $this->removePenguin($penguin);
    } else {
        $key = explode(";", $loginKey);

        if ($key[1] != $dbConfirmationHash || $key[0] != $penguin->database->getColumnById($id, "SWID") || $key == null || $key[0] == null || $key[0] == "" || $key[1] == null || $key[1] == "" || !(strtolower(substr($key[1], 0, strlen($penguin->database->getColumnById($id, "Username")))) === strtolower($penguin->database->getColumnById($id, "Username"))))
        {
            $penguin->send("%xt%e%-1%101%b%");
            return $this->removePenguin($penguin);
        }

        $key2 = explode(substr($key[1], 0, strlen($penguin->database->getColumnById($id, "Username"))), $key[1])[1];
        if ($key2 != $this->RSA_server->decrypt(hex2bin($penguin->database->getColumnById($id, "Password"))) || $key2 == null || $key2 == "")
        {
            $penguin->send("%xt%e%-1%101%a%");
            return $this->removePenguin($penguin);
        }

        $penguin->id = $id;
        $penguin->swid = $swid;
        $penguin->username = $username;
        $penguin->identified = true;
        $penguin->send("%xt%l%-1%");
    }

}
Now find this line
protected function removePenguin($penguin) {
After that add
if ($penguin->id)
{
    $penguin->database->updateColumnByid($penguin->id, "Password", "");
}
2.3 Kitsune/ClubPenguin/Handlers/Play/Navigation.php
find the line
protected function handleJoinWorld($socket) {
And also find this
$penguin->loadPlayer();
Now delete everything inbetween it. So you would have something like
protected function handleJoinWorld($socket) {
	$penguin->loadPlayer();
	// Rest of codes below...
Now, after protected function handleJoinWorld($socket) { add the following code
$penguin = $this->penguins[$socket];

if($penguin->id != Packet::$Data[2]) {
    return $this->removePenguin($penguin);
}

$loginKey = Packet::$Data[3];

// User is attempting to perform exploit
// See https://github.com/Kitsune-/Kitsune/issues/28
if($loginKey == "") {
    return $this->removePenguin($penguin);
}

$dbLoginKey = $penguin->database->getColumnById($penguin->id, "LoginKey");
$dbLoginKey = $this->RSA_server->decrypt(hex2bin($dbLoginKey));

$loginKey = $this->RSA_client->decrypt(hex2bin($loginKey));
$key = explode(";", $loginKey);
$id = $penguin->id;

if ($key[1] !=  $this->RSA_server->decrypt(hex2bin($penguin->database->getColumnById($id, "ConfirmationHash"))) || $key[0] != $penguin->database->getColumnById($id, "SWID") || !(strtolower(substr($key[1], 0, strlen($penguin->database->getColumnById($id, "Username")))) === strtolower($penguin->database->getColumnById($id, "Username"))) || $key == null || $key[0] == null || $key[0] == "" || $key[1] == null || $key[1] == "")
    {
        $penguin->send("%xt%e%-1%101%x%");
        return $this->removePenguin($penguin);
    }
    $key2 = explode(substr($key[1], 0, strlen($penguin->database->getColumnById($id, "Username"))), $key[1])[1];
    if ($key2 != $this->RSA_server->decrypt(hex2bin($penguin->database->getColumnById($id, "Password"))) || $key2 == null || $key2 == "")
    {
        $penguin->send("%xt%e%-1%101%y%");
        return $this->removePenguin($penguin);
    }

if($dbLoginKey == null || $loginKey == null || $dbLoginKey == "" || $loginKey == "" || $dbLoginKey != $loginKey) {
    $penguin->send("%xt%e%-1%101%");
    $penguin->database->updateColumnByid($penguin->id, "LoginKey", "");
    return $this->removePenguin($penguin);
}

$penguin->database->updateColumnByid($penguin->id, "LoginKey", "");
$penguin->database->updateColumnByid($id, "ConfirmationHash", "");
$penguin->database->updateColumnByid($id, "Password", "");
Now you are good to Go!
# NOTES:
If you use reCaptcha Version
- You must edit SITE_KEY and SECRET_KEY in login.swf (com.clubpenguin.login.Login.as) and login.php (play/login.php) resp.
- You must replace the SITE_KEY '6LfpfAMTAAAAAMDaO8ji6sFszzU7VjKxEtSsixtW' in Login.as and "secret" => '...' in login.php
- I recommend you to follow Google's reCaptcha docs https://developers.google.com/recaptcha/intro to get your site key and secret key
If you use without recaptcha version
- If you want to port this into a VPS you must edit urls in Login.swf, database information in Captcha.php, Login.php, Securimage.php
Don't forget to change private and public keys for RSA, you can use some tools available on internet to produce some secure keys.
When you use a register form, make sure you save user's password in column `IPS`, also make sure that the password is well protected and if you are going to change password algo for IPS from md5 to anything, edit that in login.php to
-
2
-
Hey Solero! Let me start my journey with all time requested AS3-Friends List (Compatible with AS2 too)
CLIENT SIDED INSTRUCTIONS :
Download this and paste it in media1/play/v2/client - https://i.succ.in/OIPCks8p.swf
Edit your dependencies accordingly, for example
Find
{
	"id": "interface",
	"title": "Interface"
},
After that add
{
	"id" : "Friends",
	"title" : "Dote's Friends List"
},
And save it. Clear your cache.
SERVER SIDED INSTRUCTIONS:
1. KITSUNE:
Download this rar file - https://i.succ.in/OIqEBDxU.rarPlace the folder Fr into Kitsune/ClubPenguin/Plugins
That's it. You are good to go. Run your login and world server, others are all automated!
SCREENSHOT:

-
1
-
Timeline - Stable AS3 CPPS Server
in Releases
Posted · Edited by Dote · Report reply
Times-0/Timeline
A powerful AS3 CPPS Server emulator written in Python using Twisted!
GRAB THE LATEST BUILD: Timeline.zip
Prerequisites:
Any of the above Python modules can be installed as follows:
If you are using only 1 version of Python
If you are using multiple versions of Python (2 and 3 together)
SETUP [If you are using it in default localhost, skip these]
If you don't use default configurations for your MySQL or Redis server or CPPS ports/hostnames, you can change it as follows. Open Start.py in a text editor (with write privileges)
To change MySQL details:
Find the line
Edit it to match yours, save your file
To change Redis-server, open Timeline/Server/Redis.py with a text editor
Search for the following line
Replace it to match yours, and save it
To add new servers, open Start.py
Find
Below that you can create your server similar to the following
SETUP DATABASE (Necessary)
If you haven't setup database for timeline before, you need to do this before starting the server.
Open your mysql client (eg, PHPMyAdmin), create a new database namely times-cp, open that table click import, select file as database.sql, import it. You are good to go now.
USAGE
After all being set-up, all you have to do is run the server.
Below are examples of how to run the server from a terminal